[ Disclaimer, Create new user --- Wiki markup help, Install P99 ]
Skarlorns-leveling-sol-a-leveling-guide
Skarlorn's Guide to Leveling in Solusek's Eye
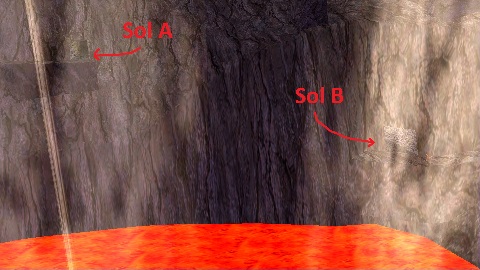
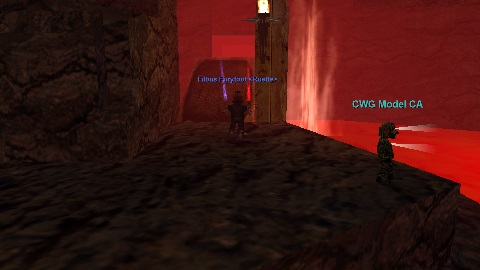
Aerial view of the lava lake in northern Lavastorm Mountains. Sol A entrance is higher up than Sol B entrance.
Solusek’s Eye is an ideal dungeon for people leveling 20-35. The goblin horde inside teems with Fine Steel and valuable bricks of ore. It has a remarkable experience modifier. As with any rewarding zone, it is perilous. This is underlined by the entrance to the dungeon itself: a narrow, curving staircase that catwalks over a pool of lava. If you fall in the lava, you will die. Welcome to SolA.
Overview:
This guide will give you an in-depth understanding of what you can expect when you venture into the dungeon called Solusek’s Eye (searched for by the command /who all soldunga). I will talk about the various monsters and their factions. I will touch lightly on the traps you may encounter. You will receive valuable advice on where to go & when.
My goal is to distill a highly complex and confounding zone into a place where you can reasonably expect to lead a group in at the appropriate level, and if you fight well, lead them out. However, I will not reveal certain secrets about this mysterious and deadly dungeon, as some surprises are best left for the unwary.
See the lava? Don't fall in. Welcome to Sol A.
Monsters –
The labyrinth of Solusek’s Eye is filled with many foes. An overwhelming cabal of fire goblins rules most of the zone. Among them you may find burning efreeti who wear curved silk shoes, fire drakes and even a lone kobold. The gnomes control the other portion of the dungeon. In their overwhelming greed, they have carved out a fine fortress for themselves deep below the fiery mountains. In this Monster Overview, I will give you a brief idea of what you can expect each faction to present in terms of monsters and overall presence. For more specific leveling advice, check out Where to go & When.
Goblins –
By far the major faction of Sol A, fire goblins represent the lowest and some of the highest level monsters in the dungeon. Ruled by the Goblin King and his advisor Lord Gimblox, goblins are concentrated most heavily at the goblin castle, as well as the north end of the zone which is commonly referred to as ‘captain’. In between the king and his captain are a long series of hallways filled with goblin wizards, shamans, warriors, rogues, and miners. These goblins go from level 20 to level 30.
Gnomes –
Gnomes are all around tough cookies. While fewer in number than goblins, they pack a harder punch. For instance, the Clockwork Gnomes are practically immune to magic. Many gnomes are mages. Inside the castle are treasures to buy and treasures to take from the mauled corpses of your gnomish victims. The choice is yours.
Efreeti -
A small tribe of fire efreeti live beneath a trap floor in the northern tunnels of Sol A. These are probably not worth the effort to hunt. They cast flame DDs and have nasty damage shields. The loot they drop is not useful outside of classic era.
Miscellaneous -
Kobolds, Dark Elves, Fire Drakes, Lava Elementals... Sol A has many surprises. Go find out for yourself.
Traps –
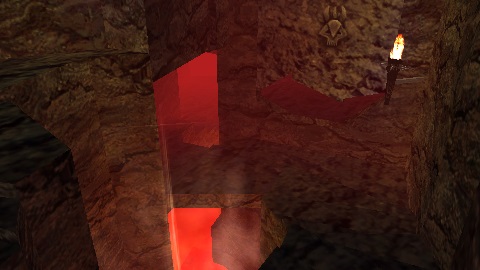
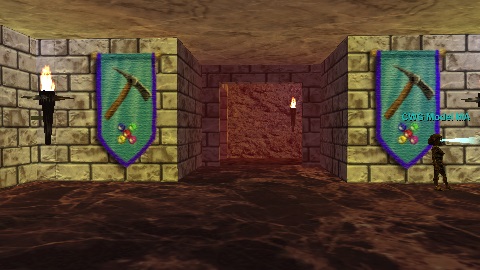
A brief photographic study of cool and normal Traps
There are many traps within Solusek’s eye. What the fire god did not carve with his claws of lava, the goblins have shaped into a treacherous fortress. You will face swinging axes, fake floors that fall into dangerous rooms, false walls which can be as useful as they are dangerous, and other strange and unknown perils… You have been warned.
Lava –
Avoid it.
If you fall into the lava pits at the zone in, you have a couple of options to try and survive. The most important thing is to get a levitate to buy yourself more time. If you are a gating class, gate. If you have a Leatherfoot Raider’s Skullcap, you may want to use the WC gate now.
Your other option is to lev up and run into SolB zoneline and then try to escape through there. However, this will put you past higher level monsters, many of whom see invisible. Recovering your corpse from there will be hard. The most common and classic solution is to let yourself be burned alive in the lava pits, and then drag your body back out with the /corpse command.
Welcome to Sol A.
Note: if you must cross lava for some stupid reason, make sure to maximize your Fire Resistance.
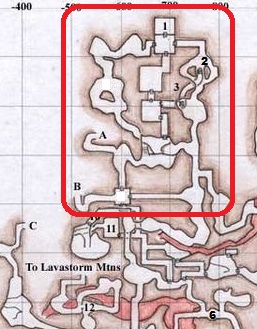
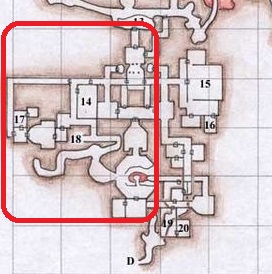
It is best to play with the p99 wiki map up at all times [1]
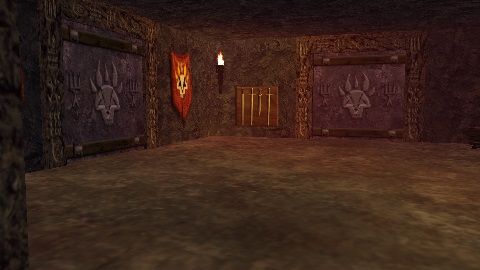
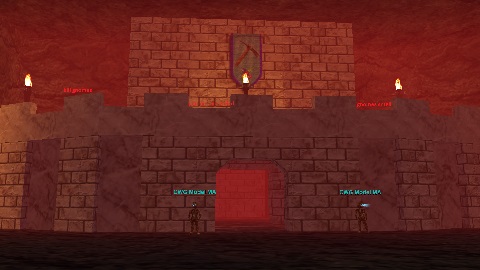
When you zone in, you will be facing South. A curving stone staircase bridges over a deadly pit of lava. If you are small enough, you can jump through the hole in the wall to the East. Otherwise, you will follow the stone staircase. One you pass through the small window room, you will be face-to-face with the Goblin Castle, a fortress teeming with your enemies. This is your essential point of orientation.
Use this ridge as your landmark. To the South is an army of fire goblins and the King himself. The tunnels to the West (your respective right) lead to Sol B. If you are in danger, you may flee that way. To the North, over the bridge, you will find the goblin miners who are supervised by the Goblin Captain and Foreman. To the East and North await the powerful gnomes in their citadel and beyond that the lava elementals.
My advice is to familiarize with the Sense Heading orientation once inside. The tunnels are small, branching, and confusing. Stick together as a party.
Now, you must ask…
Where to go & When:
Castle Entrance (Including Bridge): Levels 20-25
Roughly the area you can expect to pull mobs from
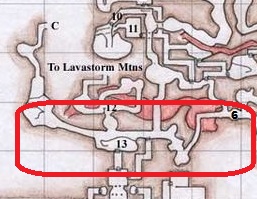
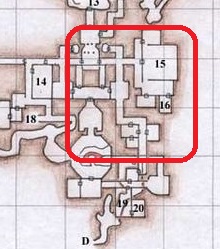
Castle Entrance and Bridge refers to the winding staircase from zone in, the ridge above castle entrance, and the small caverns adjoining that ridge, and, if you are daring, some of the goblins from within the beginning of the castle. It is marked #13 on the p99 map and is apparently referred to as the Pit.
IMPORTANT NOTE: As soon as you pull from within the castle, you will be facing significantly higher level goblins. You have been warned.
On the ridge area, you can expect young goblins and cinder goblins, who range from level 18-22, as reported by the wiki.
The best way to camp this area is to set your group up in the small cavern to the West of the ridge. This provides you zone out in case you are in danger. There are also no monsters who spawn there. From this cavern, your puller can find many goblins in the immediate vicinity by pulling the ridge and going north across the bridge, where the tunnels lead further north and there are about a dozen cinder goblins.
The eastern cavern features a couple of goblins and then the first mechanical gnome. The mechanical gnome will be KoS to evil races. It is advisable to simply avoid the gnomes unless you plan to trade with them or kill them.
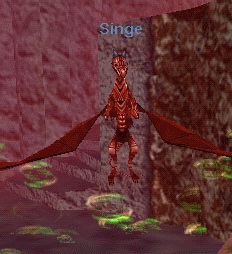
Side Boss – Singe
Singe is a nasty fuck
It’s possible to pull Singe from this area. He is dramatically stronger than the monsters around Castle Entrance and may wreck your group.
Kobold predator & Goblin Foreman: Levels 22-28
PH is a goblin, often wizard
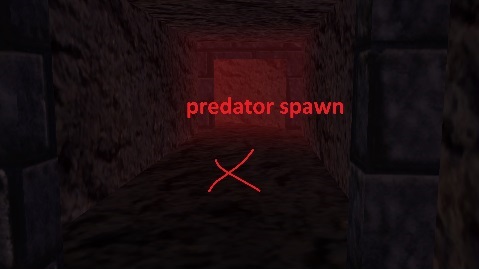
North of the fire goblin bridge at Castle Entrance is a narrow corridor.
Within that corridor spawns a kobold predator or his PH. This is a lone spawn and he drops some pretty good shoes.
If you are with a group, you should set up camp nearby. Kill the kobold or PH, and then open the door and descend the stairs (oriented south). There is a semi-circular room with 3 or 4 goblins in it. Kill them all.
Once you have recovered, prepare to pull the foreman room. Tucked around the northwest ledge of the room you are in is a door. Inside the door is a multi-spawn room with flame goblins. One of those is the flame goblin foreman. For classic era, non-twinked toons, some of his loot may be very valuable, indeed!
When you open this door, get ready for 4 goblins to "Die by Lava, Die by Flame" you
From this camp, your puller can reasonably expect to pull goblins from the foreman camp, your room, and the tunnels that lead south and east. For the adventurous souls: there may or may not be a fake wall in the foreman room. If you find this wall, it may or may not lead directly into the deepest northern goblin tunnels, where you will find many more goblins to kill. It is incredibly confusing. You have been warned.
Camping foreman and predator is a great way to get exp and money, and potentially upgrades.
You will face cinder goblins and flame goblins (who are incrementally stronger than cinder).
Fire Goblin Bartender (Bar): Levels 22-30
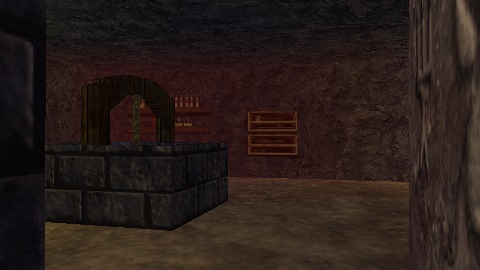
Bar is a great camp. Plenty of monsters and some good loot drops. The bar is also a very nice room. There is a fairly wide range of goblins here. Your first task will be breaking into the bar, which has something like 5 spawns. Then you will determine how much more you can handle.
Travel tightly as a group into the castle and then take the first left (oriented east). You will travel up a staircase with hallways leading off your left and right. Do not go down those hallways. Continue traveling forward (east) until you pass through a door. This is where the Bar is.
Bar has a lot of goblins getting drunk. Go slit their throats!
It will benefit you to bring strong CC. An enchanter is obviously best, but you a competent rooting class is more than sufficient. If you don’t have mez, make sure to kill casters first.
Once you break the bar, there are several rooms connected to the bar room with goblins. If you clear those out and still can handle more, have your puller head west out of the bar and into the hallways in the castle. There are many goblins to find there.
Goblin Captain and the Northern Halls: Levels 24 – 34
note: Captain room is #1 on map. Encircled area contains high density of goblins.
This is a huge portion of the zone. It favors a roaming group. The exp and money is so good here that you may encounter (somewhat pathetic) level 60s farming it for platinum. It is also very common to encounter a twinked monk soloing the entire area. However, there is more than enough to share and I suggest you cyber-bully any high levels who monopolize the content and make them feel bad about themselves until they leave the camp for your level-appropriate party of non-twinked scrubs.
On your left: entrance to Captain room.
The goblins in this area are mostly Fire Goblins and Inferno Goblins. The Inferno Goblin Captain himself is level 29. There are plenty of wizards and shamans so you will want to be prepared with resists and dispels in case your melee are slowed.
Getting there – There are a couple of ways to access the inferno goblin tunnels. You can pass through the fake wall in foreman room and attempt to navigate the halls, or you can follow the miner’s tunnel east and then north. If you are easily turned around and struggle to keep track of fake walls, I suggest the latter, although it comes with its own host of perils.
Once you are in the northern reaches of the zone, you’ll need to find a camp. There are plenty of nice caverns without traps. You’ll have to hold one of those. From there, decide if your party is up to the challenge of fighting the Captain and his guards.
The Goblin High Shaman &: Levels 27-34
This is extremely difficult to get to. If you want to go here, you’re seeking a thrill and I don’t want to spoil it by giving you too much info.
If you manage to hold this camp, you have mastered sol A. Not only is it incredibly difficult to lead a level-appropriate group to, but you’re faced with powerful shamans and wizards and lots of potential goblin ambushes. Lynada is a real bitch.
Good luck.
The Goblin King (Gimblox, Castle, et al): Levels 28-35
If the zone is empty and you can manage it, go ahead and also pull bar!
This is another huge portion of the zone with many areas to pull from. First I will explain how to get there. Then, I will explain the best place to camp and where to pull from after you have cleared the monsters in your immediate vicinity.
Getting there – head into the castle and then hang your first right (oriented west). As if you were heading to bar, travel tightly together and go forward up the stairs. Do not venture into any branching paths. You will come to a stone wall and a path leading to your left (oriented south). The stone wall is fake. Pass through it.
Observe the halfling slipping through the fake wall and going to elbow camp.
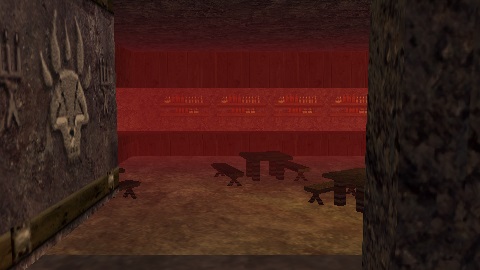
Go forward to the elbow in the hallway. This is your camp. No monsters spawn or path here. Your puller has easy access to both the king’s room (adjacent to your new camp) and to the rest of the western castle.
The King is protected by his powerful Solusek goblins. These goblins are tougher than you’d imagine. Be careful getting more than a couple in camp at a time. The King and Lord Gimblox are both relative pushovers. The King has crappy loot, but Lord Gimblox drops a valuable piece for the Cleric Epic Quest.
Note: 99% of the time, a high level will be camping Gimblox. Use diplomacy and plenty of smiley faces. The high level will usually be happy to give you all the surrounding goblins and a few buffs as long as they are still able to loot Gimblox’s ring.
Instead of writing an essay on pulling in this area, I’ll just cover the basics. First of all, you will clear the rooms outside the King room. Then you will kill the King room. From the King room, or from the fake wall, you can then head south/east and head into a winding system of lava tubes with plenty of mobs. You also have the option of clearing out jail. I recommend sticking to the halls of the front part of the castle. If your party is really awesome, you can potentially clear the entire castle, all the way to the Goblin High Shaman room.
Note: the Goblin Merchant at map marker #14 will sell to sneak classes. Get rid of your heavy items while you can!
Gnomes: Levels 28 - 40
Killing gnomes is a pursuit in pleasure and pain. The clockwork gnomes are largely immune to magic. The biological gnomes are often casters with pets and nasty damage shields. First I will address the subject of the ideal gnome-killing party. Then I will touch on various portions of the gnomish halls. They are very powerful foes for their level. If you want to hunt the gnomes for their treasure, do so, but do so very carefully.
Who should kill gnomes?
Only kill gnomes if you are an evil race or if you want to trash your gnomish faction for the lulz. (I was the latter).
The gnomes drop some amazing items for classic-era characters including the Charred Guardian Breastplate and Shield, which are incredible pre-planar items. However, it may be easier just to buy something in the East Commonlands than to camp this yourself.
A brief guide to Gnome-Slaying:
Click on bridge to lower and raise.
You will start off by killing the clockworks just east of castle entrance. This is actually a pretty nice camp for an evil duo. The gnomes continue to populate mining tunnels which head east to a lake of lava. This room, with the drawbridge, is one of two ways into the Gnomish Castle.
You will have to determine how far into the halls you want to go. The gnomes are very powerful and become densely populated. Getting a corpse out of here is a challenge. It is also very fun to kill them in the castle (and rewarding).
Lava Elementals & Efreeti
I don’t recommend these camps to leveling parties. The efreeti are in a very dangerous place to camp and are frankly not worth the effort. Similarly, getting to the Lava Elementals is a Quest in itself (you have to pass through the entire gnomish fortress). The Lava Elementals also have nasty Damage Shields. Neither camp drops useful loot at this point in p99s timeline and are probably more trouble than they’re worth.
(And I’m the sort of guy who loves doing the most dangerous camps).
CONCLUSION
Sol A is such a good leveling zone I have found literally every one of my characters lurking in its halls for much longer than intended. The experience and loot are so good that I have to force myself out and go level in other places.
Over all, you can expect mega-xp if you lead a successful expedition into Sol A. You will walk out totally encumbered by valuable loot. You will be burned, stabbed, and stained by soot, but it will have been worth it.
Using the WHERE TO GO & WHEN section, you will be able to navigate your group towards portions of the zone which are generally appropriate to the listed levels. I have obviously had to skim over large sections of the zone and so there is still much for you to discover beyond the guide. It is a highly nuanced zone that rewards the intrepid adventurer.
Compared to other zones in this level range, Sol A offers probably the highest mob density and high-tier item quality while also being underpopulated. Sol A can easily fit 30 people leveling at various ranges. Remember to cyber-bully any high levels until they give up the camp for you to exp in.
Final words of caution:
1) Avoid lava and keep up Levitate at all costs (this means carrying a stack of bat wings for your casters because they often will not have enough).
2) The traps are scarier than they are deadly.
3) Be cautious when pulling goblins as they have a tendency to swarm, backstab, AE nuke, and blind.
4) Fire peak goblins kill and maim
5) STAY WITH YOUR PARTY
6) Keep up Fire Resist
7) Bring a Crystallized Pumice for an emergency dispel of slows, blinds, or nasty DoTs
8) Don’t be discouraged by a wipe!
Final, FINAL Word
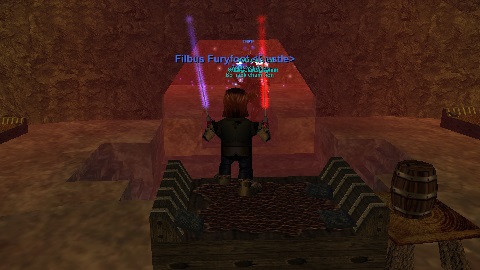
See this guy? Be mean to him!" There's almost always a high level camping Gimblox, but they can't monopolize the zone.
If you have a leveling group go into Sol A and find one of the camps (usually MOST of the zone) totally empty, it means one or two pathetic high levels are AEing goblins for the blocks of ore. They can only legally camp 1 area at a time. Force them to choose which camp/region they want and then take your party where you want. Most of the time they're cool and happy to share space. If not, I highly encourage cyber bullying.
